Shop for Fuji gear at B&H

Showing posts with label Fujifilm. Show all posts

Wednesday, June 3, 2015

New Fuji Podcast - the WeShootFuji Podcast

Scott Bourne and I have teamed up to start an international Podcast for the Fuji community. It is called the WeShootFuji Podcast.


We will talk about Fuji news, gear, tips & tricks and our wishes for future cameras and upgrades. And we will be interviewing other X-Photographers who use Fuji X cameras for their daily work and ask them to share how they get the best image results. We will also invite official people from Fujifilm to give us a little insights on the photo division of the company.

The podcast is set to air twice a month on the 1st and 15th of each month. And it is free for you to listen to.


Please subscribe and download it via iTunes:


Alternatively this ist the RSS / XML feed:


http://www.cyberears.com/podcasts/podcast_6133.xml


About your hosts:

Scott Bourne is widely recognized as bird, nature and motor sports photographer. He started his photography career in the early 1970's. And he is a pioneer in the digital audio field. He is the founder of the Photofocus.com website and podcast, and famous as a co-host of the the TWiP (This Week in Photo) and MacBreak Weekly podcasts. Scott also started the WeShootFuji website as a resource for the Fuji community.

For more information on Scott follow him on Twitter: 


I (Marco Larousse) am a fine art street and documentary photographer and one of Fuji's official X-Photographers. I have more than 30 years of experience in photography and use both, analog and digital cameras for my daily work.

For more information on me follow me on Twitter: 


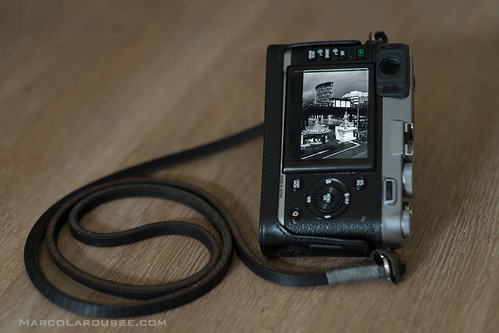
My studio where I record the WeShootFuji Podcast - captured with my X-Pro 1 and XF 16mm f1.4 lens


If you have not started to listen to podcasts yet, I suggest that you do it today. There are many great and free resources on photography out there. Download your favorite shows for the topics that you are most interested in. And learn about your passion while you are on your daily commute, exercising, going for a photowalk or post processing your photos.


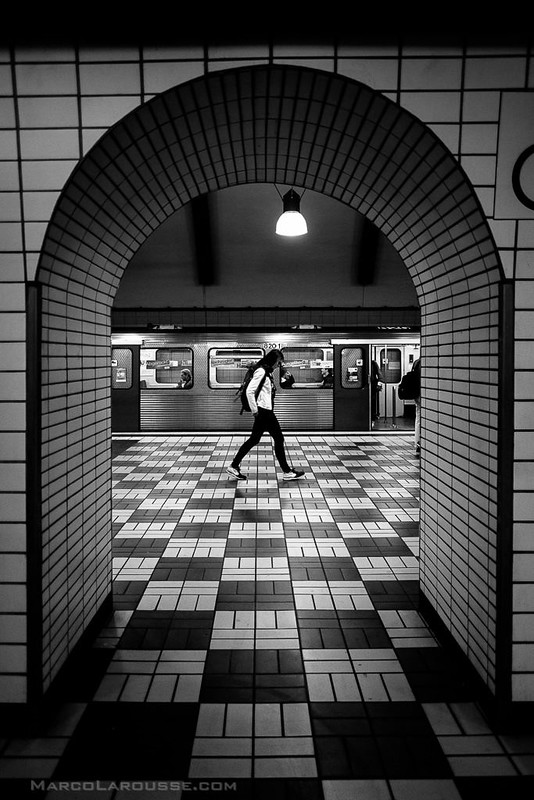
Floating on the checkerboard - Fuji X-Pro 1 with XF 16mm
Take your audio podcast with you on your daily commute - captured with the X-Pro 1 and XF 16mm f1.4 lens


If you have any further questions or want to share your Fuji-X experiences just leave a comment below, Twitter me @HamburgCam or visit my Homepage at www.MarcoLarousse.com

And if you liked my post I am always happy if you spread the word and retweet, like or google +1 it :-)

Monday, May 12, 2014

I am an official International Fujifilm X-Photographer now :)

I had been contacted by Fujifilm in December 2013 where they invited me to become an official Fujifilm X-Photographer. And now my profile and portfolio have been posted on the official Fujifilm X-Photographer website:


My special thanks go out to Fujifilm Middle East and Fujifilm Germany who supported me in the process. I am honored and happy to join the official Fujifilm X-Photographer community. It feels humbling to be part of this awesome group next to highly respected and famous photographers like Zack Arias, Kevin Mullins and Mr. Strobist himself: David Hobby. But there are so many other talented and creative photographers in this group, too. It is certainly worth to browse around and look at what other photographers worldwide create with Fujifilm X-Cameras!

What will change about my FujiXfiles blog now?
My FujiXfiles blog has been read by more than half a million readers since I started it in mid-2012. I have gotten a huge amount of positive feedback and got to know so many great photographers from all over the world through it.

My main reason to start this blog was to show what these little Fuji-X mirrorless cameras can do and to post tips and tricks on how to get the most out of them. And I will continue to do it in the future, too! :)


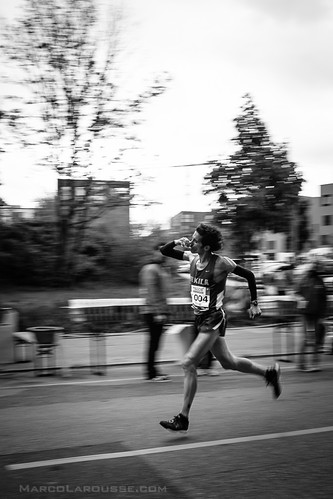
Hamburg Marathon 2014 - Fuji X100S with WCL-X100
Yes, you can get good sport action photos without a big DSLR :) - Fuji X100S


The most read post on my blog so far has been the one about the X system AF focus tips. And while the overall performance of Fuji X-Camera AF has been constantly improved via FW updates it may still be worth to take a look at it again to get the best possible results from your X-Camera.


Fuji X100S SOOC B&W JPG look great!
Remember that the Fuji X-Cameras give you great B&W images straight out of the camera?


I will continue to write about my experiences with Fuji X-Cameras and show photos that I have taken with them. And I will still speak freely my personal opinion about Fuji-X products. I have no problem to point out things that I feel can improve the products. After all, I want the Fuji X-Cameras to be the best cameras as possible for me. And Fujifilm has shown in the past that they listen to us photographers and customers in order to built a long lasting customer relationship. And that is what inspired me to write this blog post after 3 years of using Fuji X-Cameras: "Domo Arigato Fujifilm and Ganbatte Kudasai!"


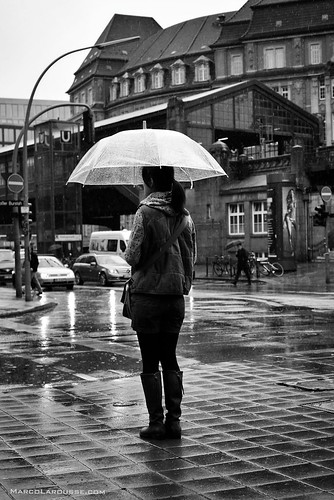
Hamburg rain street photography - Fuji X100S
Fuji does not let their X customers stand in the rain. I love the  FW feature updates :)


And one more thing! If the X-Photographer status will ever get me to test gear that is not announced, I will naturally not talk about it! 100% certain, so don't even ask! And if I'll ever speculate about future Fuji X products this will be based 100% on my personal opinion without any inside information or knowledge. In that respect my guess is as good as yours :)

With that out of the way, I hope that I can be of help to Fujifilm and all X-Photographers in continuing to make the Fuji X-System the best it can be.

 
Leica M6 - Ilford Delta 400 captures Fuji X-Pro 1
I am a rangefinder style camera guy - Here my Leica M6 captures my Fuji X-Pro 1 with XF 56mm lens


If you have any further questions or want to share your Fuji-X experiences just leave a comment below, Twitter me @HamburgCam or visit my Homepage at www.MarcoLarousse.com

And if you liked my post I am always happy if you spread the word and retweet, like or google +1 it :-)

Monday, July 15, 2013

Fuji X100S Review - Is it worth to upgrade from the classic X100?

After a 2 year production cycle, Fujifilm upgraded the revolutionary X100 and introduced the X100S. The X100 was the reason I bought my first digital Fuji camera a little over 2 years ago and it has turned me into a loyal customer, also buying the X10 and X-Pro 1. The X100 was also the first camera that I preordered without ever holding it in my hands or reading a single review (there were no reviews at the time I preordered).

The X100S is my daily companion - even in bad weather
The X100S is my daily companion - even in bad weather there are scenes to capture

But now the question for me and countless other classic X100 photographers was: Should I upgrade to the X100S?

Fujifilm introduced the revolutionary hybrid viewfinder with the X100 and gave the camera an external control layout of a classic film camera with aperture, shutter time and exposure compensation that can be controlled blindfolded with your finger tips.

But the X100 was not without flaws. While the image quality was stunningly wonderful even in Firmware 1.0, some of the ergonomics were... hmmm... let's say "challenging".

The original FW was lacking some streamlining in the menu and the minimum focus distance before having to switch to Macro mode was almost a deal breaker for me. Especially since it requited the photographer to push buttons 3 times before the Macro mode was activated or deactivated.
But most of these issues were fixed with continuous FW updates and the AF plus MF quality and speed was improved over time, too.
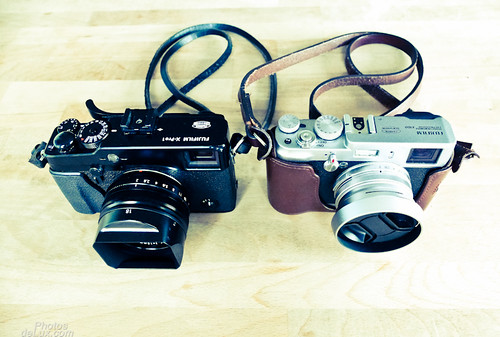
Is it worth upgrading to the X100S
I'm already owning the X-Pro 1 and classic X100 - so is it worth buying the X100S?

So why should I upgrade if the X100 is a good camera with the current FW? Well, because the X100s is simply better at everything!

There were certain things that Fuji was not able to fix in FW on the classic X100 as they were hardware related. The X100 and the X100S exterior are almost identical but the trained X100 photographer will happily notice the subtle but important changes that Fuji made.

The first thing that I appreciate is the physically raised "menu" and "OK" button. You won't have to operate this important button with your fingernails any more. Secondly, the 3 position focus mode slider now has the most used modes at the easy to slide to top and bottom position (Manual focus and AF-S standard mode) while the least used mode for me (AF-C continuous that can only be used with center focus point) now sits at the fiddly middle position (where formerly the most used AF-S was placed). The AF-Point selection and Drive buttons also swapped places. This enables you to move the AF-Point with one finger while staying glued to the viewfinder. This fantastic improvement was also introduced in the 2.05 X-Pro 1 FW (1.06 on X-E1) update via Fn button.
Lastly, the RAW button turned into the Q-Menu (Quick menu overview) button that is known and loved from the X-Pro 1 / X-E1and X10 but did not make it to the original X100, yet.

Just these ergonomic changes could be reason enough for the enthusiast X100 photographer to upgrade. But wait, there is more! Fuji lists 70 improvements that have been implemented in comparison to the previous version of the X100. OK, let's make it 69 as I find the mere attachment of the "S" badge not to be a real usability enhancement ;)

I will not go through the whole list of remaining improvements but rather tell you what I find extremely helpful from a daily usability point of view:

The single biggest improvement for me is the reduction of the minimum focus distance before having to switch to Macro mode. It has been reduced by 40% down to 50cm (20in) from 80cm (31in) on the previous version. I was constantly in the close range for portraits and having to switch to Macro was annoying and slowed down the AF locking process considerably.

AF with improved close focus distance
The X100S has an improved AF close focus distance before having to switch to Macro mode - high five for that!

Next on the list to mention is the improved AF and MF speed. The contrast AF now gets supported by phase detection pixel on the sensor to speed up the AF in certain well lit situations. And when the phase detection pixel take control the AF locks very, very fast. If the contrast detection takes over, the AF speed feels about as fast as the AF speed on the classic X100 with current FW.

So how can one make the phase detection pixel to always be in charge? Well, Fuji claims that you will need a decent amount of light. Then you need to use the focus points around the center as these PD pixel are only covering 40% of the sensor around the center.

I did as Fuji told me, but I still find it very hard to control if PD or CD AF will be used to lock focus. Even if I aim the focus point at the same subject and try to lock AF repeatedly with half pressed shutter, it will sometimes pump (CD AF) and sometimes be instant (PD AF) to lock focus. This and an improved AF lock rate in backlit situations are two of the few areas where I hope for improvements in future FW updates. When you have a blazing fast PD AF it should be used as often as possible. But aside from this wish I should add that even right now this is the fastest and most reliable AF of the current APS-C size sensor Fuji X-Cameras.

And if you struggle with any of your Fuji X cameras AF, read this article that I wrote about maximizing your AF results with Fuji X cameras

The improved X100S AF in action

And thanks to a higher resolution EVF, focus peaking and the now ambient light independent manual focus system, this is currently also the best manual focus Fuji X-Camera (until the FW 3.0 update for the X-Pro 1 and X-E1 on July 24, 2013 anyway).

Operating Speed:
The X100S also operates faster than the classic X100. There is no noticeable shutter lag and switching settings in menu is instant. If maximum operating speed is important to you, then switch off all energy saving- and switch on all performance improving features. What also helps is when you use the fastest UHS-I SDHC cards. I use the 16GB SanDisk Extreme 95MB/s and I'm very happy with the speed they write my RAW + JPG files.

 No noticeable shutter lag = perfectly timed captures
 No noticeable shutter lag = perfectly timed captures

Power consumption and batteries:
But with all energy saving turned off, I highly recommend that you buy at least one, or better yet, two spare batteries for your X100S. There have been situations where I got less than 350 images out of one charge with lots of reviewing and constant EVF use. And since my first experiences with two off brand batteries were so negative (they would not physically fit into the X100 battery compartment without getting stuck) I now only buy the original Fuji batteries.
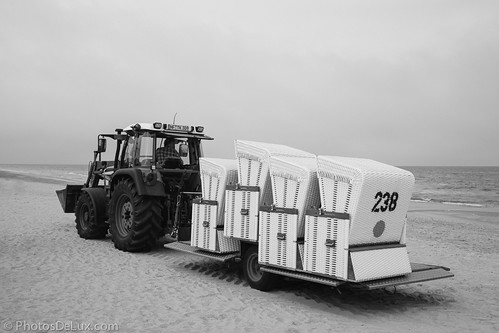
Landscape photography with an urban touch
Just a visual reminder to take extra batteries with you for long photo walks with your X100S ;-)

Charging:
Talking about batteries, the charger that comes with the X100S now doesn't have a loose adapter part (to hold the battery in place) any more. After loosing this part on my X100 charger on a trip, I glued the replacement part permanently to the charger. Now Fuji attached this part permanently.

But what also needed improving was the charging time for empty batteries. An empty X100(S) battery will need 3.5 to 4 hours to charge completely! And unfortunately this has not changed with the X100S charger :-(

This becomes really annoying when you are on a photo trip and come back to the hotel at night with 2-3 empty batteries. I end up setting my alarm to wake up after 4 hours to switch batteries in the charger, so that I have at least 2 fully charged batteries for the next day. If anyone knows a faster charger for the X100 battery, please let me know! And no, a second charger is not an option. Traveling light is one of the reasons why I switched from DSLR to mirrorless for the majority of my work.

Raw street photography

Image Quality
The biggest change concerning the image quality between the X100 and the X100S is the switch from a 12 MPix bayer array sensor to the 16 MPix X-Trans II sensor (this is an updated version of the X-Pro 1 & X-E1 X-Trans sensor.)
The original X100 certainly has an outstanding image quality and color rendition and still performs incredibly well today. But the extra 4 MPix and new sensor technology of the X100S are nice for extra cropping and ISO headroom. From looking at my images EXIF data I would say that the X100S has a 1 stop ISO noise advantage over the X100. This becomes quite visible at ISO 3200 and 6400. But I also have the feeling that the ISO sensitivity on the X100S is about 1/2 of a f-stop less sensitive. This leads to slightly longer shutter times at equal exposure situations. But over all there is still a bit of a gain in favor of the X100S and the "noise" of the X-Trans sensor looks very film grain like.
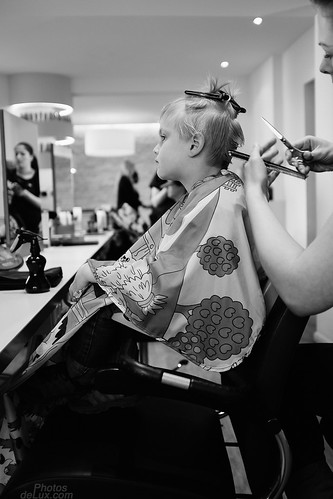
@ the barbershop - Fuji X100s
I'm 100% satisfied with image and detail quality that I get from the X100S!

The JPG color rendition is also a bit different between these two generations of X100 cameras. I have noticed this when I first started using the X-Pro 1 with the X-Trans sensor compared to the X10 and X100. This difference is mostly visible in yellow and green parts of the image. The X10 and X100 are very similar to each other while the X-Pro1 and X100S are more of a match to each other. Yet, if you don't do a direct A-B comparison, you will not notice this subtle difference in tonal rendition. And the out of camera JPG image look is beautiful from both sensors!
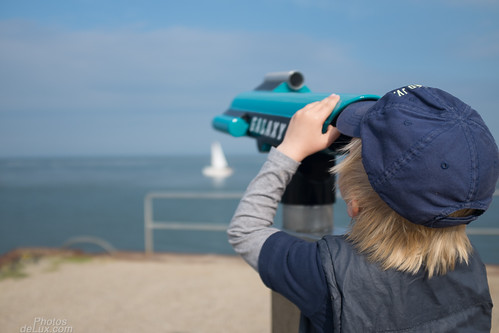
Natural skin colors and an analog  film like look are one of the strength of Fuji X cameras
 Natural skin colors and an analog  film like look are one of the strength of Fuji X cameras

If you enjoy to give your photos a look of other analog film types than what the Fuji X-Cameras already offer internally, take a look at the products from VSCO. They offer their 3 film packs for LR and Aperture now with support for Fuji X100, X100s, X-E1 and X-Pro 1 Raw files.
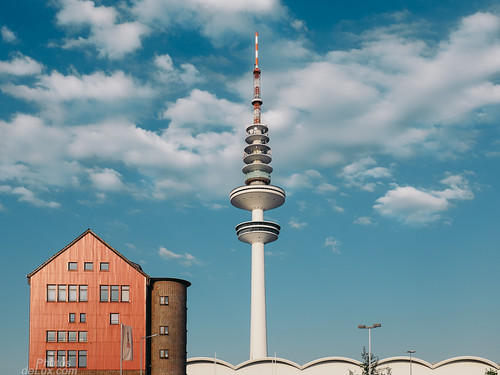
A little VSCO Film adjustment in LightRoom gave the X100Simage this look
 A little VSCO Film adjustment in LightRoom gave the image this look

The lens picks up some flare and this is identical to the lens on the original X100. Hence, I would buy the lens hood with adapter for two reasons:

1. To control flare.

2. To have a filter thread for the use of filter or simply to plug in a standard lens cap (49mm filter and lens cap for the adapter without the lens hood and a 52mm lens cap for use with the lens hood attached - you can see this on the second photo from the top). And do get the lens caps with the pinch release in the middle of the cap!

Street Portrait - Fuji X100s
 The lens hood saved me from flare in this backlit image

My settings:
The X100S has turned into my every day take along camera. It is my street, portrait and city/landscape tool. And, I use it 95% of the time as a B&W camera! I set the camera to record JPG + RAW and set the JPG to be captured in BW + Red Filter. This way the EVF and the review image in the EVF & OVF will show a B&W image which is closest to the way I would process it. The RAW file still contains the color information and will be rendered as a color image in my LightRoom collection, next to the B&W JPG image.

I find that seeing a scene in B&W is less distracting and lets me focus more intensely on the subject and situation of the scene.
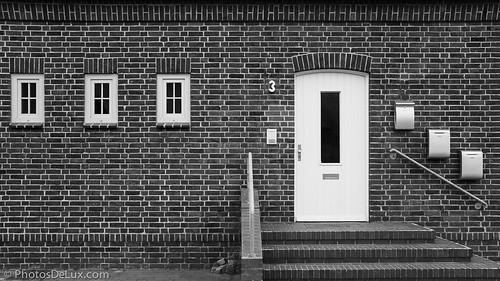
The Brick Wall test
Lens distortion is well controlled in JPG images and easily adjusted on RAW with a +5 setting in LightRoom


These are my preferred every day settings when I'm out with the X100S:

- Fn = ND Filter (heavily used in bright conditions to overcome the f2 & 1/1000s limit)
- RAW + JPG
- ISO: Auto 6400 at 1/100s (I'd rather take a bit more noise than motion blur)
- Film simulation: B-R (B&W Red Filter)
- Sharpness: +1
- Highlight Tone: 0
- Shadow Tone: +1
- Noise Reduction: -2
- MF Assist: Max
- High Performance Mode: On
- Power Saving: Off
- Review Time: 0.5 S


I'd say that even with a fixed 35mm equivalent field of view (to a 35mm film camera) the Fuji X100 and X100S cameras are very versatile:

Reportage photography:

Reportage photography X100S


Portrait photography:
Portrait photography with X100S


Architecture photography:
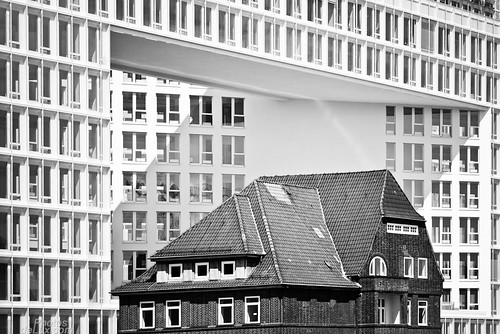
Architecture photography with X100S


Landscape photography (with VSCO Filmpack Filter applied):
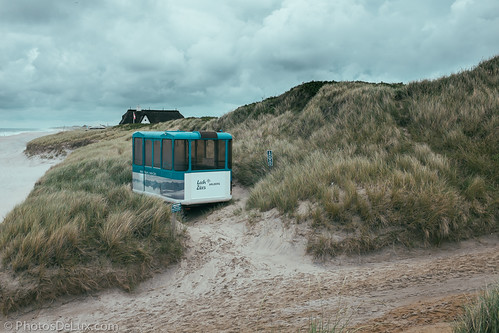
Landscape photography with VSCO Filmpack Filter applied


My Résumé:
The original X100 was a revolutionary camera with great image quality and a few quirks, but most of them were taken care of in FW updates. Still, after using the original X100 for 2 years my first 24h with the X100S convinced me that this is the camera I have been waiting for! And at first I didn't even want to upgrade as the image quality of the X100 is still very, very good.

But it seems like all of my suggestions to improve the usability of the original X100 were implemented. Someone at Fuji must be either reading my mind or reading my blog and forum posts ;-) The X100S is truly a worthy successor with improvements in almost all aspects - making my daily work with this camera a pleasure.

When I'm out with the X100S I don't have to think about how to operate the camera. I can simply concentrate on framing my shot and evaluating the scene. I operate the aperture, shutter time and exposure compensation directly on the dedicated wheels without taking my eye off the viewfinder. And I'm get an instant 0.5 second quick review image to check if I got the shot the way I intended it. If the X100S didn't already exist one would have to invent it! :-)

I think that if Henri Cartier Bresson would still be alive and in the market for a mirrorless camera, he would probably look very closely at the Fujifilm X100S - it's that good of a street photography tool.
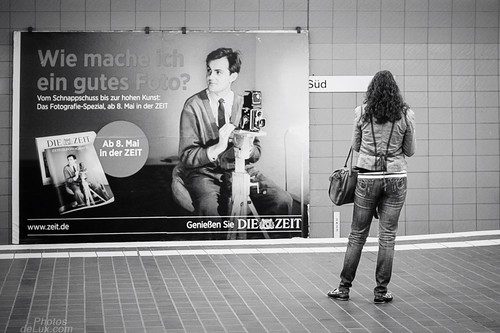
Add translates to: "How to take good photos"

To finally answer the question if the X100s is worth the upgrade from the X100? After using this camera daily for more than 3 month with roughly 5000 photos taken, I can answer this question with a big "YES!" for myself. So if you are still in doubt if this upgrade is worth it for you, go to your camera store and give it a try! This camera might also be an alternative for people who are interested in the Fujinon XF 23mm f1.4 lens for their X-Pro 1 or X-E1. Besides that the XF 23mm f1.4 lens is not released at the time I'm writing this, the X100S can also be seen as a 23mm f2 lens with a fine camera attached. And it would make a nice back up camera, too :)

And it is also worth a second look for people who had operating issues with the classic X100.
But I must also add that this does not make the classic X100 an obsolete camera. If you don't want to spend the new price on a X100S and don't mind the minor operating issues that I had with the classic X100 (mainly close focus distance before having to switch to Macro, MF in low light and two handed AF point selection) it is still a camera with wonderful image quality at a very interesting used price. And take a look at the Fuji X photographers who still use the original X100 and the stunning images that they create with it. Only the difference in image quality from the new sensor would not have been my reason to upgrade...

Probably one of my last Fuji X100 photos
One of my last photos taken with the classic Fuji X100

If you have any further questions leave a comment below, Twitter me @HamburgCam or visit my Homepage at www.MarcoLarousse.com

And if you liked my post I am always happy if you spread the word and retweet, like or google +1 it :-) 

Monday, October 8, 2012

Fuji X10 and Firmware 2.0 Review and Samples

One thing I really enjoy since I started using Fuji X cameras is that Fuji listens to us users and pushes out Firmware updates over time that don’t only improve speed and reliability, but also add features.

I have been enjoying the use of my Fujifilm X10 as my most compact “serious“ camera. I always take it along when I only have a coat pocket of space for a camera and I’m always amazed by the quality images I get from this small sensor camera. The awesome fast lens does work perfectly together with the EXR sensor. But the fast zoom lens comes at the price of a little bit bigger size. Unlike a Canon s95/S100 who’s lens retracts 100% into the body to give a small package that fits in your shirt pocket, the lens of the X10 sticks out too much for any shirt pocket that I own. But my coat pockets will hold the X10 comfortably.

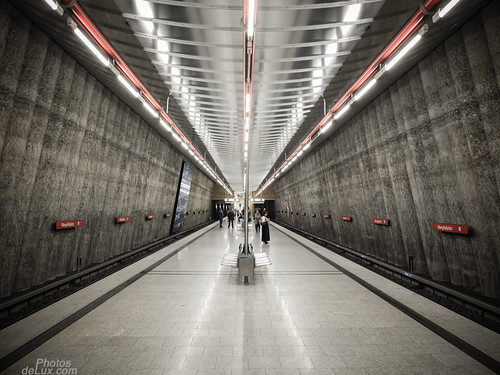
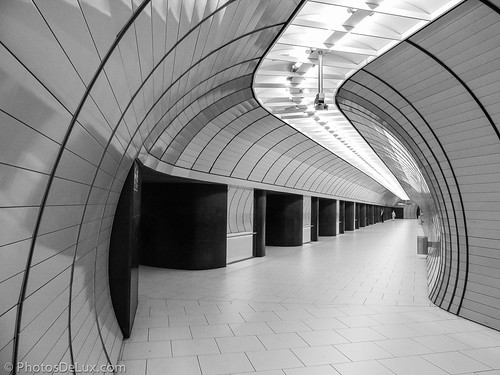
I just returned from a 1 day business trip to Munich. I only had a little extra room in my bag and it was easily filled with the X10. Here are three quick photos that I snapped on the way:

As always, click on the image for a larger version


A cool looking subway station that is hidden in the south of Munich: Spaceport Munich - Fuji X10 sample


And the very famous Marienplatz station that most Munich visitors come across: Munich Marienplatz Station - Fuji X10 sample


The X10 has a great auto white balance even in this tricky yellowish airfield lighting and very good ISO 1600 quality for a small sensor camera
Fuji X10 ISO 1600 AWB sample


___________
Firmware 2.0

Last Friday my almost one year old Fuji X10 received a 2.0 firmware update from Fuji. Two things were mentioned as changes in the release notes:

1. The “Q“ (Quick) Menu that I love so much on my X-Pro 1 was added to the X10 “RAW“ button. You now have the camera’s most important functions all on one detailed screen to quickly change them.

2. An “Advanced Filter” function has been added. Those filters can be activated in the Advanced Mode and give you the choice of 5 special filter effects (Toy Camera, Miniature, Pop Color, High-Key, Dynamic Tone and 6 individual color key (partial color) filters.

I have spend some time over the weekend to play with the new firmware functions. The added “Q“ Menu alone made the upgrade worth it for me. Although you need to be aware that you loose the option to program the “RAW“ key with a custom function. The Fn key can still be programmed with you favorite function, though.

The color filters are a nice add on, too. But to be honest, I’m not a big fan of these filters in general. I do, however, see why Fuji added them to the prosumer targeted X10 compact. The X10 is a very capable compact camera. And I enjoy the excellent image quality and natural color rendition of the original files straight out of the camera. But there are users who prefer a different style of look to their images that had to be applied outside the camera in a photo editor, untill now.

But now you can choose the filter style you like in the Advanced menu and preview the effect the filter will create live on the LCD. One click and the image has been captured in that style and is ready for upload via USB, SD-Card reader or Eye-Fi card.

Here are some examples of what some of the filters look like (out of camera):


The Miniature filter: Fuji X10 Miniature filter sample


The Dynamic Tone filter: Fuji X10 Dynamic Tone filter sample


The Partial Color Blue filter:
Fuji X10 Partial Color Blue filter sample


And the High-Key filter:
Fuji X10 High-Key filter sample


While it is convenient to have the camera bake the filter style automatically into your photo there is a drawback. Once the JPG is created, there is no turning back! The effects only work in JPG and don't work on your RAW files. So there is no way to neutralize your image file after the filter style has been applied. Therefore use the filter effects wisely!

While I tested the filter effects, I started to wonder if their use could be improved. I came up with the following suggestions/questions:

1. Why can't the filter effects be created from a RAW file inside the camera's RAW converter like the film simulations?

2. Why can't the filter effects be incorporated into the "Drive" function "Film Simulation Series"? This way I could choose one or two effects and still have the original Provia file.

3. Why can't the filter effects be accesed in the "Q" menu for quick changing?Maybe Fuji listens once again to our suggestions - and please Fuji, add the "Q" menu to the X100's Raw button, too ;-)


If you have any further questions leave a comment below or Twitter me @HamburgCam

And if you liked my post I am always happy if you spread the word and retweet, like or google +1 it :-) 

Wednesday, August 1, 2012

Fuji X-Pro 1 AF (Autofocus) speed and accuracy - Review and tips


It seems to me that speed and quality of the Fujifim X-Pro 1 autofocus is one of the hottest topics about this camera on the web. "Is it as fast as...?" "Is it capable of sports, action, etc...?"

I will focus (no pun intended) on this topic for todays post and give you my experiences and tips on how to get the most out of the X-Pro 1 in terms of focusing. As of today, I took more than 10,000 images with the X-Pro 1 in the past 4 month. That gives me a pretty good idea of what the AF can and what it can't do.

The X-Pro 1 AF will not rival the speed of the Nikon D4 or Canon 1D X - that should not be a surprise to anyone. But there are ways to make the AF of the X-Pro 1 perform fast enough for most situations.

Future Dirk Nowitzki? Fuji X-Pro 1
No, you don't have to fake it like this in order to take photos of moving subject with the X-Pro 1 ;)


The X-Pro 1 uses contrast detection autofocus (CDAF) compared to phase detection autofocus that is usually found in DSLR cameras. As I have shown in an earlyer post, I like to photograph at minimum aperture to create a shallow depth of field. And in those situations perfect AF lock is essential for good results. The advantage of contrast detection is, that it is very accurate when it locks onto the target. On my phase detection  DSLR camera I have gotten used to pushing the shutter half way for 2-3 times before I trust that the AF locked correctly onto the subject.

You can give this a try for yourself. Take your DSLR and your fastest lens - a 50mm lens with f/1.8 or faster would work great. Then open the aperture all the way and look for a subject  about 1 m (3ft) away. Now press you shutter (or designated AF button) once untill you get the focus lock feedback. Now do it again. Did you hear the AF in the lens moving (pumping)? And give it a third try. Still hear movement? If so you are hearing the lens readjusting every time.

I found that in those situations the contrast autofocus is usually spot on the first time while the phase detection AF needs a few pushes and a series of images to get a perfect result.

The advantage of phase detection AF is, that it is better at tracking subjects, especially if they move towards or away from you. The continious contrast detection AF on the X-Pro 1 did not yield good results for me when set to AF-C (continuous) mode.

So is the X-Pro 1 useless for moving subjects? Not at all! You just have to approach things differently to get good results! Here are my tips to get the best results from the X-Pro 1:


1. Learn what the X-Pro 1 AF needs:
Although the X-Pro 1 will generally focus without a problem in good light, there are situations where you need to aid the AF to lock onto your subject. These situations could be a very low contrast object like a plain wall, low light or backlight behind your subject.
In those situations you need to remember that the contrast autofocus of the X-Pro 1 does not focus like a cross type sensor. Think of the AF to work like a split screen focusing screen on a classic SLR camera. Therefore you should aid the X-Pro in horizontal orientation (landscape orientation) to find a vertical line on the subject for your AF point to focus on. In vertical orientation (portrait orientation) look for a horizontal line to focus on. It took me some time to figure this out, but you can give it a try on your white bathroom tiles as a hands on exercise to remember this.


There are situations where you might not find the edge or line in the correct orientation for the focus frame to aim at. In those situations I keep the viewfinder on my eye, tilt the camera slightly (maybe 25° clockwise or counterclockwise) an half press the shutter untill I get the focus lock confirmation. I keep the shutter half pressed, turn the camera back into the orientation that I desire, reframe and click!

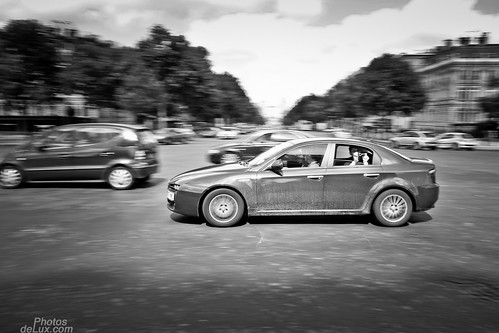
Drive by Tourism - Fuji X-Pro 1
This car was driving parallel to me and the AF of the X-Pro 1 did not have any problems to lock focus on the first try


2. Focus points are your friends:
Choosing you focus point is critical. In electronic viewfinder mode (EVF) I set my focus point (focus frame) to its smallest size (push the AF button and turn command dial to the right). This way I reduce the potential for focus error in situations where the focus point covers too much of a subject. How annoying would it be if you focus at an eye, but the AF chooses the nose as it happens to be in your focus area, too?
A larger focus point will however increase the chance that it can focus on something in critical focus situations as described in 1. above. So there might be situations where it can be helpful to increase the size of your focus point.

You should also get very comfortable to use focus point selection. I get far better results when I select the focus point to be on the correct spot in the frame compared to focus and recompose - especially with the XF 18mm lens. I tend to get really close to my subject with the 18mm lens to get a shallow depth of field. And during the focus and recompose process a few centimeters movement can ruin the focus. So get that muscle memory in your fingers trained to press the AF button once and then select the focus area on the arrow buttons. When you want to quickly recenter the AF point afterwards, just push the AF button once and then click the "OK" button in the mittle of the arrow keys - voilá :)

Fuji X-Pro 1 - XF 18mm f/2
The best way to get this sharp result was to set the focus point to the top right of the frame onto the keyhole


3. Focus speed - Yes, it can!
Like I said in my introduction, the X-Pro 1 AF will not be your best choice if you want to use AF-Traking for fast action photography. However, I found the focus speed to be much better than I expected. But once again, you'll probably have to operate the AF differently to what you are used to.

To archieve the fastest AF speed on the X-Pro 1 set the AF to AF-S (single) and turn the power save mode off. Then adjust your focus point to be on the area of the frame where you want to lock focus on (if you constatntly don't get good results try to increase the AF point size for that situation). Now aim at your subject and quickly press the shutter all the way. Yes, you press it all the way without waiting for half press focus confirmation! It took me some time to learn this approach as I have done it properly differently for the past 8 years. But change is good if the results improve. Give it a try, you will probably be surprised :)

Decisive moment for a soccer striker - Fuji X-Pro 1
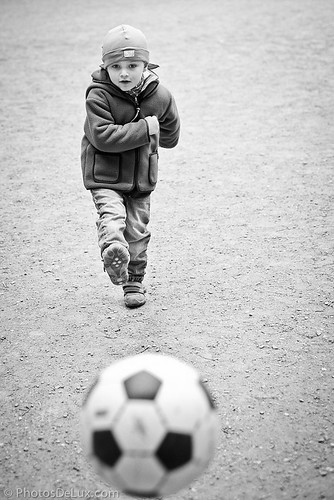
Contrary to Zack Arias review I found that the X-Pro 1 is suitable for kids soccer photography ;)


4. Fast action sports - Yes, you can!
There are however limits to what the X-Pro 1 AF can handle. Once you are getting into really fast or close action it is up to you! Kind of "Don't ask what your camera can do for you. Ask instead what you....." you get the idea ;)

Once you reach the limit of AF speed, and that is the case for any camera, you will have to rely on your own skill to capture the action. Believe it or not, before AF was invented photographers took fantastic action photos, too. The secret for good results is to lern how to manual zone focus.
First, you will need to anticipate the area of the scene where the action will take place and switch the focus mode to Manual. Secondly,  prefocus to the spot where you want to capture the action and stop the lens down to an f-stop that allows for enought depth of field (zone) where the subject will be in focus. The manual focus distance scale indicator in the viewfinder will show this depth of field zone (white line) in front and behind your focus distance indicator (red line).
Finally, you only need to set your minimum shutter speed to either freeze the action or to leave a bit of motion blur. Now let the subject walk (or run) into your zone of focus.

Hamburg Marathon 2012 Impressionen - Fuji X-Pro 1
Zone focusing the X-Pro 1 with 35mm at f/2.8 was the only way to get a good image this close to the action


5. EVF or OVF for best results?
To get the most accurat framing and focus spot you are best off by using the EVF. And for manual focus and macro photography the EVF is pretty much your only choice. I also prefer the EVF in dark situations as it amplifies the scene and makes it much brighter than in the OVF! Yet, some people don't like to use EVF as there is a bit of lag and the refreshrate can be too slow for some situations. But as you have probably guessed by now, there is also a trick to overcome the EVF display lag in critical timing situations.This will work best if you are photographing with your right eye on the viewfinder. We can take advantage of the X-Pro 1 rangefinder style layout by framing and pre focusing our shot with the right eye on the EVF and then opening the left eye, too in order to look "live" at your subject. Now you see the live "feed" of the scene with your left eye a bit faster than the scene through the EVF. And this can give you the critical edge in timing that smile you want to capture or simply avoiding closed eyes due to blinking of your subject. It takes a bit of practice to get used to it, but it works really well for me. For people who look through the viewfinder with their left eye this trick will only work in portrait orientation.
Naturally, you don't have the lag issue with the OVF. Due to the bigger field of view compared to the actual frame lines the lens/sensor combination captures, you can also better anticipate a subject before it walks into your capture frame. The drawback of the OVF is parallax error. As you are not looking through your lens like you would in a (D)SLR or EVF style camera, you need to compensate for the difference in position from your eye to your lens. This parallax error gets bigger, the closer you are to the subject!
The X-Pro 1 offers a setting in the menu (switch Corrected AF Frame to "ON") to show an estimation of the focus point and framelines shift according to the distance the AF measured. The adjusted focus point and framelines will appear after you half press the shutter to focus and then recompose to adjust the framing. Note that you can't reduce the size of the AF point in OVF mode (it would not be accurate enough). You can however move the focus point around.

Hamburg Marathon 2012 Impressionen - Fuji X-Pro 1
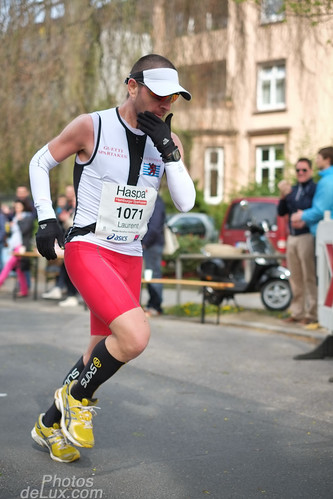
I looked with my left eye past the camera to time this photo and with my right eye through the EVF for general framing. If I would have relied only on the EVF for timing, the lag would have caused me to push the shutter a fraction of a second too late.


Conclusion:
There are certainly limits to what the X-Pro 1 AF can do, but I find the performance of the AF and MF to be very usable. I sometimes read that people (probably not so experienced photographers) are unhappy with the AF performance of the X-Pro 1. But you'll have to do some things differently than what you might be used to in order to get the best results with this camera. There is no face detection or object tracking on the X-Pro 1 - so if this is what you have been used to in your previous camera you now have the perfect opportunity to learn more photography techniques that will put you in charge of the results. Try it, it can be very rewarding. After all, who likes to be only on the passenger seat all the time? ;-)

DSCF5670
A friendly Sony NEX-5n photographer wanted to return the favor and take a photo of me with my X-Pro 1. I guess he never photographed without face detection AF before ;)
Click on the image to read the whole story on this unsharp photo.


If you have any further questions leave a comment below or Twitter me @HamburgCam

p.s. Most of these tipps will also work on the Fuji X100 and Fuji X-E1

And if you liked my post I am always happy if you spread the word and retweet, like or google +1 it :-) 

Thursday, July 26, 2012

Fuji X-Pro 1 and Olympus OM Zuiko lenses

After my review on the Kipon Canon EOS to Fuji XF adapter, I am going to write about how the Kipon Olympus OM-XF adapter performs on the Fuji X-Pro 1.

Fuji offers their own intelligent adapter for Leica M lenses. And if I were fortunate enough to own Leica M glass, I would buy the Fuji adapter in a heartbeat.

But I still own some Olympus OM Zuiko lenses from my old analog OM-4 Ti. Therefore another Kipon adapter was ordered and I had it connected to the X-Pro 1 quite often in the past month.

Unfortunately, my OM lens collection on the wide side overlaps with my current Fujinon XF lenses in terms of effective focal length. This leaves me with the Olympus OM Zuiko 50mm f/1.8 Auto-S and OM Zuiko 100mm f/2.8 Auto-T as useful additions to my current X-Pro 1 lens lineup. Great thing about those two lenses is that they are rather compact (compaed to the Olympus 50mm f/1.4 and 100mm f/2). And with the additional lengt of the Kipon OM-XF adapter, you'll want as short of a lens as you can get - unless you want to end up with an odd looking drainpipe sticking out from your slim X-Pro 1 body ;)

The biggest advantage of the OM lenses vs. the Canon EOS EF lenses is that you can select the aperture right on the lens itself. No aperture "hack" required :)

And how do they perform? The image quality is great! I mainly use the 100mm as this effective field of view equals 150mm on a full frame body. Somehow I did not find much use for the 50mm (75mm equivalent FOV), yet.

Both performe really well wide open. But in order to use them wide open your focus has to be spot on. And that is quite difficult to manage with the current stage of the EVF refresh and magnification rate offered by the X-Pro 1. Did I mention before that I wish for a second MF magnification level of 5X in addition to the 10X we already got? And focus peaking would make focusing long MF lenses so much easier...

But the way it is right now (X-Pro 1 with FW 1.10) I usually stop down on moving subjects to f/5.6 in order to get enough depth of field to compensate for focus inaccuracy. It works but it takes a bit potential away from this great combo.

So if you want to use your OM (or any other manual focus) lens wide open on the X-Pro 1 make sure you aim at static objects - possibly even with the camera set on a tripod.

Here are some sample images - as always click on the image to see a larger version:

Last one standing - Fuji X-Pro 1
"Last one standing" - X-Pro 1 with Olympus OM 100mm f/2.8 Zuiko at f/8


Happy Bokeh Friday 08.06.2012 - Fuji X-Pro 1
As they were posing for their own photo I was able to nail focus with the OM 100mm wide open at f/2.8 - nice bokeh, too


First contact - Fuji X-Pro 1
Architecture works also well with the OM 100mm at f/5.6 as there is virtually no distortion!


Analogman @ work in Paris! Fuji X-Pro 1
Another lucky shot with the 100mm at f/2.8 - I wished focusing this long lens would be more reliable with the EVF in scenes with moving subjects


Hiding - Shrouded in a scarf - Fuji X-Pro 1
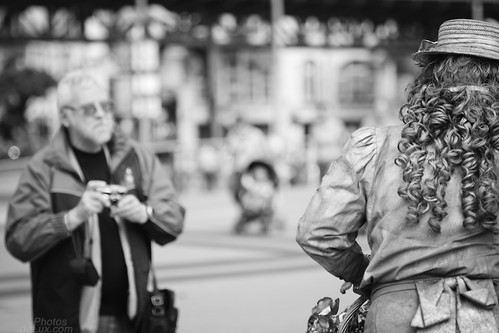
This was shot in a crowded place but I was able to single out this undercover lady with the 100mm lens at f/5.6


Olympus OM 50mm f/1.8 auf Fuji X-Pro 1
This is an example of how well the OM 50mm f/1.8 looks on the X-Pro 1


Getting close - Fuji X-Pro 1 with OM 100mm
And just in case if you are interested in how the OM 100mm handles color images... Looks very natural to me :)


DSCF5813
The OM 100mm f/2.8 isn't a dedicated macro lens - but look at the details on the focus point on the "C" from Cycle in the full size image at f/2.8!!! (click the image)


Fuji X-Pro 1 with Kipon OM-XF adapter and Olympus OM 100mm f/2.8 Zuiko lens
And now you probably want to see how the adapter and lens combo looks like when attached to the X-Pro 1. Notice that the Kipon OM-XF adapter itself is about half as long as the 100mm lens.


To sum it up:
The Olympus OM lenses were good lenses back in the analog days. And the once I tested perform really well on the X-Pro 1, too. So if you still have some OM lenses in the drawer, think about getting an OM-XF adapter for your X-Pro 1. And if you don't have any old lenses, check for used OM lenses on the web or at you used camera store.

Against my usual believe to go for the "faster, bigger and more expensive lenses" I would suggest to go for the smaller, lighter, cheaper ones when it comes to OM 50mm f/1.4 vs. f/1.8 and OM 100mm f/2 vs. f/2.8. The "slower" lenses perform really good and due to the challenging EVF focusing on the X-Pro 1 you might end up stopping the lenses down anyway.

If you have any further questions leave a comment below or Twitter me @HamburgCam

And if you liked my post I am always happy if you spread the word and retweet, like or google +1 it :-)